Game Instructions
Thanks for playing John Deere North American Farmer. This document will help you understand how to play the game. Farmers have a lot to learn before they become good at their job, and this game has a lot for you to learn, too. Don't worry, you won't need to know a lot about agronomy or animal science, but you will need to know some basics of how to navigate through the game interface and ways of getting things done on your virtual farm. Ready to get started?
From the main menu, you can start a new game by clicking the New Game button. You'll need to make some decisions about what type of game you want to start. The first choice to make is whether to play a Scenario or a Free Play game.
If you want to play a Free Play game, you will begin in an empty map and can pretty much do whatever you want on the farm. Maybe you want to raise animals, grow corn, build lots of barns. This game mode lets you do whatever you want. Obviously, there are rules and you only have so much money to spend on your farm, but the objective is simply to run a profitable farm.
When you choose Free Play, you'll get to decide which game map to play with. You can choose from three regions in the Midwest, representing difficulty levels, or you can load a custom-created map, if you have one. You also get to name your farm and choose your two starting family members. All starting characters are equally good farmers at this point and this is just for your preference.
If you would rather play a Scenario, you will begin a game with a specific objective. Some scenarios have goals of raising animals or crops, others have financial goals or other objectives. Select one of the scenarios from the list and you can read the instructions and decide if you would like to play it. You don't have to play the scenarios in order. When you play a scenario, you do not choose the map or the farm workers. This is chosen for you as part of the scenario setup.
After choosing a scenario (or Free Play and picking a map and family members), click the Begin button and your game will start. Grab your work gloves and get started!
Most games will take you longer than a few minutes to play (and some could take hours), so you may want to save your game so you can resume later. During the game, you can click the Game button (or press Esc) and then choose Save. Give your game a name and it will be saved to a file. Later, you can use this game menu to select Load to resume from where this game was saved. You can also use the Load Game button from the main menu to load an existing game.
If you want to pause your game, you can press the Pause key on your keyboard. Opening some windows in the game will also pause the game automatically while you work in that window.
You may adjust various game settings by clicking Options. Some options are not changeable during your game, so it is best to adjust options from the main menu. However, if you want to change audio volume or other basic options, you may do so during a game by clicking the Game button and then pressing Options.
Audio options include settings for volume and music. Video includes settings for resolution and special effects. If your game is running too slowly on your computer, you may wish to try a lower video resolution or a lower shader option. Preferences lets you adjust other game properties that may help improve speed of your game or other personal preferences.
When you start a game you will have a view of the game world in the main game window. This is showing you a portion of the entire game map. To scroll around and view other areas of the map, drag your mouse to the edges of the screen and the view will move in that direction. You can zoom your view in and out using the mouse wheel, or the page up and page down keys. You can also rotate the camera by holding down the 'ctrl' key as you move your mouse left or right.
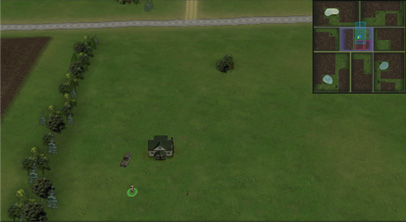
You will also see a small inset map in the upper right corner. This is referred to as your radar view, as it shows not only the entire map, but colored dots to represent people, vehicles, and structures, as well as colored rectangles showing you which parcels of land you own and where you have planted fields of crops. It helps you see where things are on the entire map. To move your view to a specific location in the game world, click in the radar and the view will change to show you that portion of the map.
Clicking on the radar is disabled when you have the auto-track camera turned
on for a farm worker. You will see this option as a small eyeball icon ![]() next to a person's face at the bottom of your screen (a worker must be selected).
By clicking to turn on this auto-track option, the game view will always be
centered on this worker, no matter where he or she walks or drives.
next to a person's face at the bottom of your screen (a worker must be selected).
By clicking to turn on this auto-track option, the game view will always be
centered on this worker, no matter where he or she walks or drives.
![]()
Game time moves at an accelerated rate, which can be adjusted using the three buttons at the top of the screen. 1x moves at a normal pace. 3x is three times as fast. 5x is five times as fast. This is frequently useful when you want to speed up the game while you wait for crops to grow or other activity to occur.
The calendar is also shown at the top of the screen so you can see the current time of year. The game season lasts from March 1 to October 31. Winter is not simulated and you will start a new season when October ends. In Free Play mode, you can play year after year, continually. In some scenarios you will have a time limit to accomplish the scenario objectives.
![]()
The two primary modes in a game are Build and Play, selected by two buttons at the top of the screen. In Build Mode, you work on the structure and layout of your farm: buying and selling land, arranging your crop fields, pastures, and animal fences, building barns and other structures. In Play Mode, you instruct your workers to perform various tasks on the farm. Game time is suspended in Build Mode and runs in Play Mode.
![]()
![]()
 In
Play mode, you can bring up the Market menu by clicking the Market
button at the top of the screen. The market menu is where you can view prices
of commodities (grain and animals), buy equipment, hire employees and services.
There is also a shortcut button from the main interface to go straight to the
equipment section of the market menu.
In
Play mode, you can bring up the Market menu by clicking the Market
button at the top of the screen. The market menu is where you can view prices
of commodities (grain and animals), buy equipment, hire employees and services.
There is also a shortcut button from the main interface to go straight to the
equipment section of the market menu.
![]()
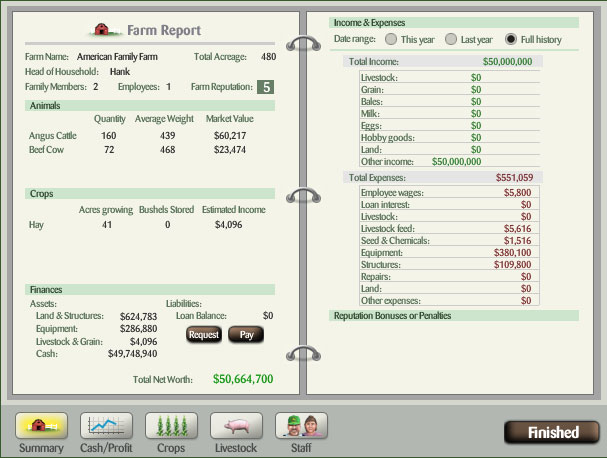
By clicking the Farm button from the top menu bar in Play mode,
you can view details and statistics of your farm: how many acres you have, what
crops are growing, what animals you own, your past income and expenses, your
staff, and so forth. This is mostly for viewing information, but you may also
request a loan from this window, and you may use this as a shortcut to find
a specific field or animal enclosure.
To get a loan, go to the Summary tab in the Farm window and click the Request button. You may borrow a certain amount, limited by your net worth. As your net worth increases, you can borrow more if you need to. Net worth is calculated based on your assets such as land, equipment, structures, and commodities (minus any loan balance, of course). When you carry a loan, you will be charged interest each month. The request/pay dialog shows you how much the interest will be. You carry the loan indefinitely, but at any time you can click the Pay button and use some of your cash to pay back this loan. If you are a good farmer, you can use loans to leverage your assets and make a greater long-term profit, but there is always the risk that you will lose your investment if you aren't careful how you use the money.
The following is a list of keyboard shortcuts to perform various actions or open menus or windows during the game:
| B | Build Mode |
| P | Play Mode |
| F | Farm Statistics |
| M | Market Menu |
| E | Equipment Menu |
| W | Weather |
| T | Time acceleration cycle 1x, 2x, 3x |
| 1-0, -, = | Select specific farm worker |
| Tab | Cycle through workers |
| C | Auto-track camera on/off |
| Arrow up/down/left/right | Scroll view |
| Page up / Page down | Zoom view in/out |
| Esc | Game menu |
| Pause | Pause game |
To give orders to your farm workers, you need to first select them. You can do this by clicking their face in the list of workers at the bottom left of your screen in Play mode. You may also click on the person directly in the game map. When a worker is selected, you will see various information and a larger face preview of the person at the bottom of your screen. To deselect a worker, right-mouse-click anywhere in the game map. If you accidentally select some other object in the game, such as a vehicle or field, you may always use the right mouse button to deselect it.
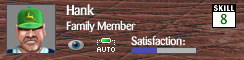 One
type of farm worker is a Family Member. In free play, and in most scenarios,
you will get several family members who work on your farm. Family members live
there and have no weekly wages, so they are a valuable type of worker. But family
members have a requirement that they be kept satisfied. You can see how satisfied
a family member is by selecting the person and looking at the satisfaction bar
at the bottom of the screen. Highly satisfied family members get a bonus to
their skill level. Poorly satisfied family members get a penalty to skill level,
and may leave the farm after a while. Various other events during the game can
cause family members to arrive or leave from your farm, but your primary family
member--the head of the household--will never leave the farm, no matter what
his or her satisfaction level is.
One
type of farm worker is a Family Member. In free play, and in most scenarios,
you will get several family members who work on your farm. Family members live
there and have no weekly wages, so they are a valuable type of worker. But family
members have a requirement that they be kept satisfied. You can see how satisfied
a family member is by selecting the person and looking at the satisfaction bar
at the bottom of the screen. Highly satisfied family members get a bonus to
their skill level. Poorly satisfied family members get a penalty to skill level,
and may leave the farm after a while. Various other events during the game can
cause family members to arrive or leave from your farm, but your primary family
member--the head of the household--will never leave the farm, no matter what
his or her satisfaction level is.
To keep satisfaction high, make sure you have nice housing on your farm. A house is more pleasant to live in than a trailer home. You can also buy leisure items such as a swimming pool and a trampoline to boost family member satisfaction. Working your family members too hard will cause satisfaction to drop, but giving them a rest will cause it to be restored. Finally, special events may occur that cause satisfaction to go up or down for your family.
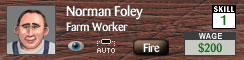 Employees
are the second type of farm worker. To hire an employee, go to the Market
menu and select Hire Employees to view the current job market.
You must pay employees weekly for their services. They have no satisfaction
rating like a family member does, and have no concerns about leisure items or
housing, but if you can't make payroll, they will quit and your farm reputation
will be lowered.
Employees
are the second type of farm worker. To hire an employee, go to the Market
menu and select Hire Employees to view the current job market.
You must pay employees weekly for their services. They have no satisfaction
rating like a family member does, and have no concerns about leisure items or
housing, but if you can't make payroll, they will quit and your farm reputation
will be lowered.
Employees will only work on a farm with a good reputation relative to their skill level. For example, a skill level 6 worker is willing to work on a farm with a reputation rating of 5, but no less. If the farm's reputation drops while an employee is working on the farm, he or she will demand a raise to stay on the farm.
You can fire an employee at any time, but your farm reputation will be lowered as a result. If you think you can't afford to keep an employee for a long period of time, you probably shouldn't hire him or her. Employees are not paid over the Winter, so there is no need to fire employees in the Fall and hire them back in the Spring.
All farm workers--family members and employees--have a skill level between 1 and 10. This represents how talented and experienced the person is. Higher skilled workers will do some tasks faster than lower skilled workers, and are better at operating farm equipment, so will give you a higher yield when you raise crops. Higher skilled employees cost more in wages, of course.
Over time, as a worker is given tasks on the farm, his or her skill level can go up. Family members may also get a bonus or penalty to skill level if they have a very high or very low satisfaction rating.
To cause a worker to move to a specific place on the game map, select the worker in Play mode and click anywhere on the ground. The person will walk to that location. The targeted location must be open; the worker will not walk into a tree, water, field, or other obstacle. The worker will not walk anywhere if he or she is currently occupied with a task.
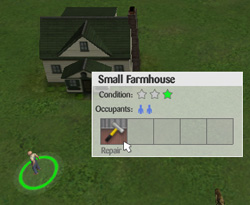 Most
objects in the game (structures, vehicles, fields, livestock enclosures) have
associated tasks that your workers may do. To assign a task, first select the
worker you want to do the job. Next, select the object that has a task. A popup
menu will show you what tasks are available for this worker. For example, you
could click on a house and you will see that you could do a "Repair"
task. By selecting this icon, you assign the task to the worker and he or she
will proceed to work on it until it is finished. Some tasks require special
vehicles and equipment and will not appear in the list of available tasks unless
the worker is driving the correct vehicle or towing the correct implement.
Most
objects in the game (structures, vehicles, fields, livestock enclosures) have
associated tasks that your workers may do. To assign a task, first select the
worker you want to do the job. Next, select the object that has a task. A popup
menu will show you what tasks are available for this worker. For example, you
could click on a house and you will see that you could do a "Repair"
task. By selecting this icon, you assign the task to the worker and he or she
will proceed to work on it until it is finished. Some tasks require special
vehicles and equipment and will not appear in the list of available tasks unless
the worker is driving the correct vehicle or towing the correct implement.
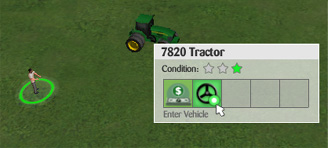 Vehicles are driven
by workers. To drive a vehicle, first select the worker you want to be the driver.
Next, click on the vehicle. A popup menu will appear with possible tasks for
the vehicle. One of the tasks is called "Enter Vehicle." By selecting
that task, the person will walk to the vehicle and get inside of it. Once the
person is in the vehicle, you may click the ground anywhere (just like a command
to walk) and the person will drive the vehicle to that location. Only one person
may be inside a vehicle at one time. To exit the vehicle, click the vehicle
again and choose the "Exit Vehicle" task.
Vehicles are driven
by workers. To drive a vehicle, first select the worker you want to be the driver.
Next, click on the vehicle. A popup menu will appear with possible tasks for
the vehicle. One of the tasks is called "Enter Vehicle." By selecting
that task, the person will walk to the vehicle and get inside of it. Once the
person is in the vehicle, you may click the ground anywhere (just like a command
to walk) and the person will drive the vehicle to that location. Only one person
may be inside a vehicle at one time. To exit the vehicle, click the vehicle
again and choose the "Exit Vehicle" task.
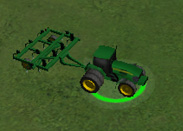
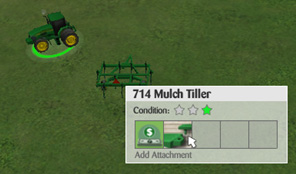 Tractors and the
combine have different implements they must use. You could hitch a plow, a planter,
or several other pieces of equipment to your tractor. To hitch an implement,
first you must have a worker driving the vehicle. Next, click on the implement.
A popup menu will show possible tasks for the implement, one of which is "Add
attachment." When you select this task, the worker will drive the vehicle
to the implement and attach it. After this point, the implement moves with the
vehicle and you may do other tasks using this combination of equipment. You
may only attach implements to a vehicle that does not already have something
attached. Some implements may only be attached to certain vehicles. To disengage
an implement, click the implement and choose the "Remove attachment"
task. The vehicle is now free of the implement and may attach a different one.
Tractors and the
combine have different implements they must use. You could hitch a plow, a planter,
or several other pieces of equipment to your tractor. To hitch an implement,
first you must have a worker driving the vehicle. Next, click on the implement.
A popup menu will show possible tasks for the implement, one of which is "Add
attachment." When you select this task, the worker will drive the vehicle
to the implement and attach it. After this point, the implement moves with the
vehicle and you may do other tasks using this combination of equipment. You
may only attach implements to a vehicle that does not already have something
attached. Some implements may only be attached to certain vehicles. To disengage
an implement, click the implement and choose the "Remove attachment"
task. The vehicle is now free of the implement and may attach a different one.
You can switch your workers into Auto mode and they will complete certain tasks automatically, such as feeding animals or milking cows. To switch a worker to Auto mode, click the Auto button at the bottom of the screen with a worker selected. The button will turn green, showing Auto mode is on;
 and an auto task panel will appear by the worker. You can choose specific structures (and all tasks associated with that structure) by clicking them while this panel is showing. You will then see the structure entered in to the list. Just deselect the worker to close the auto task panel. If you don't wish to target specific structures then just leave the list blank and the worker will try to cover all structures. To remove a structure from the auto task list highlight the desired structure in the list by clicking it to select it. Then just click the Remove Auto task Structure icon in the lower left corner of the panel. |
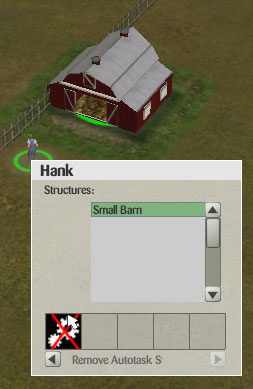 |
If you manually assign a task to an auto tasking worker then it will turn off auto task for that worker. Another way to turn off auto mode, click the Auto button again. To use auto task your workers must be skilled enough to handle work on their own. Also, some tasks require higher skill levels than others.
Auto mode tasks include (in priority order): Feed animals, Milk cows, Retrieve eggs, Clean barn or coop, Care for sick animals, Repair structure, and Sell hobby goods. The worker will not begin an Auto task until he or she detects that the task has reached a minimum level. For example, the worker will not feed the animals until the herd's hunger level reaches 50%. Tasks that require more advanced decision making, such as choosing to plant a certain crop or deciding when is the best time to harvest, are not automated.
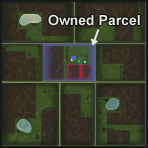 The
game map is subdivided into land parcels. You can only build and use structures
and fields on land that you own. You always begin the game with at least one
parcel of land. You may buy and sell parcels to expand or move your farm. Remember
that once you have built a structure, it becomes part of the parcel. If you
sell the land, you also sell the structure. The radar view shows owned parcels
with a blue highlight.
The
game map is subdivided into land parcels. You can only build and use structures
and fields on land that you own. You always begin the game with at least one
parcel of land. You may buy and sell parcels to expand or move your farm. Remember
that once you have built a structure, it becomes part of the parcel. If you
sell the land, you also sell the structure. The radar view shows owned parcels
with a blue highlight.
![]() To
buy or sell a parcel of land, switch to Build mode then click
the Buy/Sell Land button. As you move your mouse over the game
map, the cursor will show you a Sell or a Buy
icon, indicating that you may click to sell a parcel of land (if you own it)
or to buy a parcel of land (if you do not own it). When you click the land parcel,
you will get a window showing you the cost, size, and other information about
the parcel.
To
buy or sell a parcel of land, switch to Build mode then click
the Buy/Sell Land button. As you move your mouse over the game
map, the cursor will show you a Sell or a Buy
icon, indicating that you may click to sell a parcel of land (if you own it)
or to buy a parcel of land (if you do not own it). When you click the land parcel,
you will get a window showing you the cost, size, and other information about
the parcel.
Remember that you can only operate a farm on land you own. Your vehicles may still be parked on land that you have sold. You can still drive them in order to move them to another parcel of land. Any structures or fields on unowned land may not be used.
In order to plant crops, you must have field borders marked on your parcel of land. These field borders look like dirt paths and represent the areas in which your tractor and other vehicles will drive to plant, plow, or do other field tasks. You might have one very large field for a single type of crop. Or maybe you split your land into several smaller fields to plant different crop types.
Most parcels of land have large areas of farmable terrain, which looks visually like brown dirt. In order to use that terrain, you define field locations. The parcel you begin the game with may have several fields already laid out as examples. You can change the size of fields, remove them, and add new ones. There is no cost associated with making field adjustments; this is just part of the planning you will do in raising crops.
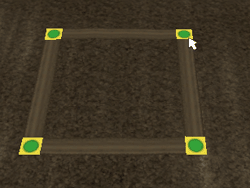 All
editing of fields takes place in Build mode. To select a field,
click anywhere inside the field borders. You will see green handles at each
corner. Click and drag these handles to adjust a field shape. You may only adjust
empty fields. If a field has crops in it, you must plow it before you can adjust
the field size.
All
editing of fields takes place in Build mode. To select a field,
click anywhere inside the field borders. You will see green handles at each
corner. Click and drag these handles to adjust a field shape. You may only adjust
empty fields. If a field has crops in it, you must plow it before you can adjust
the field size.
To add a new field, click the New Field button. As you move your mouse over the terrain, a small new field may be placed anywhere by clicking your mouse. Use your right-mouse button to cancel. New fields may only be placed in farmable areas (dirt) and may not intersect other fields or structures.
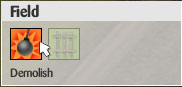
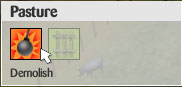
To delete a field you simply select the field and then click once more inside the field to open up the field options panel. Just click the Demolish icon to remove the field.
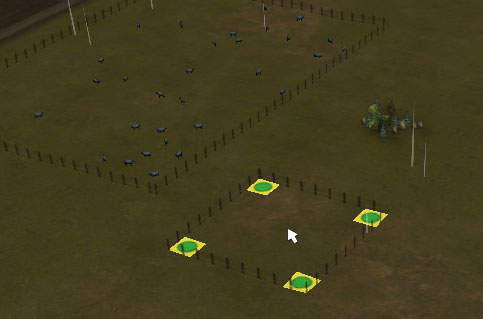 To be able to raise Angus cattle you must have pastures on your farm. All
editing of pastures takes place in Build mode. To select a pasture,
click anywhere inside the pasture borders. You will see green handles at each
corner. Click and drag these handles to adjust a pasture shape. If a pasture currently has livestock in it you can not resize the pasture smaller than the minimum size for the current amount of livestock.
To be able to raise Angus cattle you must have pastures on your farm. All
editing of pastures takes place in Build mode. To select a pasture,
click anywhere inside the pasture borders. You will see green handles at each
corner. Click and drag these handles to adjust a pasture shape. If a pasture currently has livestock in it you can not resize the pasture smaller than the minimum size for the current amount of livestock.
To add a new pasture, click the New Pasture ![]() button. As you move
your mouse over the terrain, a small new pasture may be placed anywhere by clicking
your mouse. Use your right-mouse button to cancel. New pastures may only be placed
in grassy areas and may not intersect other fields, pastures or structures.
button. As you move
your mouse over the terrain, a small new pasture may be placed anywhere by clicking
your mouse. Use your right-mouse button to cancel. New pastures may only be placed
in grassy areas and may not intersect other fields, pastures or structures.
To delete a pasture you simply select the pasture and then click once more inside the pasture to open up the pasture options panel. Just click the Demolish icon to remove the pasture.
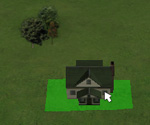
To build a new structure, such as a house or barn, switch to Build mode. The left part of the interface shows a list of structures you may build. These are in four categories: housing, leisure, utility, and hobby. Select a category from the dropdown menu and you will see the structures for each. As you roll your mouse over the structures, a description and cost appear at the bottom of the screen.
To build the structure, click on the preview image in the list. As you drag your mouse around the screen, you will see where the new structure would go. Click your left mouse button to choose a location and make the purchase. Click your right mouse button to cancel placement. Before dropping the structure on the map, you may rotate it by pressing the spacebar. You may only build structures on land parcels you own. If you are holding the structure in an invalid location, it will appear red, showing that you cannot place it there. Structures may not intersect fields, trees, or other obstacles on the map.
Most larger structures are not instantly built. After dropping them on the map, you must switch back to play mode for game time to resume and the building will be constructed.
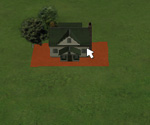
 To
demolish a structure, click on it in Build mode and press the demolish button
in the popup menu. Since buildings cost money, it is usually best to carefully
consider where you will build your structures instead of placing them and then
later needing to demolish them.
To
demolish a structure, click on it in Build mode and press the demolish button
in the popup menu. Since buildings cost money, it is usually best to carefully
consider where you will build your structures instead of placing them and then
later needing to demolish them.
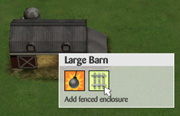
Barns, and coops have one additional option after they are constructed. You may click
on a barn in Build mode and choose to add a fenced livestock enclosure, adjusting
its size and position by dragging corner handles similar to the adjustment for
fields.
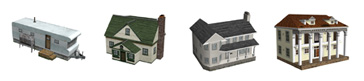
Housing structures are for your farm's family members. Each structure has a capacity and a comfort rating. Larger housing is more comfortable for your family and will cause their satisfaction to rise. Your family members do not need to be told to go to sleep or use the house in any way; night and leisure time are not simulated in the game.

| Leisure structures are similar to housing, in that they are purchased to increase the satisfaction rating of your family members. If your family is not happy, you may buy a swimming pool, barbecue, or other leisure item to increase satisfaction. To have a family member use a leisure item simply select the person, then click on the desired leisure item and then click the Use Leisure Item icon. |  |

Utility structures are for useful work-related purposes on the farm.
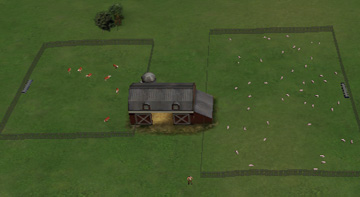
Barns are used for raising animals. The standard small and
large barns may be used for hogs and beef and dairy cattle. The dairy barn and hog barn may
be used for dairy cattle and hogs only. After a barn is constructed, you must
add at least one fenced enclosure to use the barn to raise animals. Each barn
has a certain capacity for animals. You may not own more than a certain number
of animals and must build another barn if you want to increase the number you
own. The size of the fenced livestock enclosure also limits the number of animals
you may have. Ensure that you have a large enough fenced enclosure if your barn
still has more capacity, but you cannot buy more animals for the enclosure.
Larger fenced enclosures do not cost more money, but the land occupied by a
livestock enclosure may not be used for anything else.
Coops are used for raising chickens. Similar to barns after a coop has been built you must create a fenced enclosure to be able to purchase and raise the chickens.
Stables are used for raising horses. Stables also require a fenced enclosure for their livestock.
The Pole Barns are used to store vehicles and attachments. More information is in the Storing Equipment section under the Equipment heading.
The Tool Shed lets you do repairs on structures and equipment at a faster pace than normal. Place it anywhere on your farm to get the speed bonus for your workers.
Silos are used for storing grain after it is harvested. You could store grain in order to sell it at a later date if the current market price seems too low.
The Windmill pumps fresh water for the animals on your farm. Place this structure anywhere and you will reduce the chance of your animals getting sick from dirty water.

Raising animals and crops are the main jobs on the farm. But while you wait for them to grow, you may find you have spare time when your farm workers are not busy. You can fill some of this spare time by adding hobby structures to your farm. You can earn a little extra income by selling these hobby goods at a roadside stand.
The small and large Roadside Stands are required for using hobby structures. These are where you sell the goods. The larger stand earns a higher income than the smaller stand.
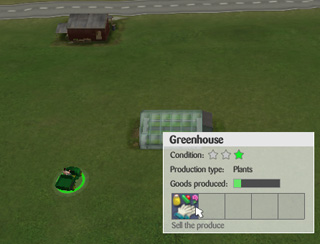
The Vegetable Garden, Flower Garden, Honeycombs, and Greenhouse are the hobby producing structures. Over time, these structures produce goods that can be sold at the roadside stand. Click on the structure in Play mode to see how much has been produced. By assigning the task to a worker to "Sell the produce," the worker will carry goods from the hobby structure to the roadside stand and your farm will earn money.
This is a John Deere game, isn't it? You need some John Deere equipment to help you get the job done. Equipment in the game is used mostly for crops, but you'll also find a few items for other tasks.
If you have either a large or small Pole Barn then you can store your equipment there. To store attachments you must be in a vehicle and have the desired attachment attached. Once you are ready simply click on the Pole Barn with your driving worker selected and click the Store Attachment button. To retrieve an attachment you must first have a worker in a vehicle capable of pulling it. Then you just click the Pole Barn to select it, highlight the desired attachment in the list, and click the Retrieve Attachment button.
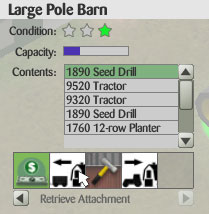
You can also store and retrieve vehicles the same way. However, you can not store a vehicle that currently has an attachment nor can you retrieve an attachment if there is currently one affixed to the vehicle.
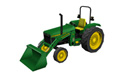
To buy equipment click the Equipment button from the main game interface. You can also get to the equipment purchase menu by clicking the Market button, then selecting the Equipment category. On this screen, you will see a list of all the equipment you can buy. Tractors, implements, and other vehicles are found here. The menu is set up in a shopping cart style. Select an item from the list, then click Add to place one in your shopping cart. You can also Remove the item if you change your mind. For some items, you may see yellow dots next to the name in the list. This shows compatibility between equipment. For example, the 7820 tractor can pull the 1590 seed drill, so a yellow dot appears when either of those items are selected. But the 7820 cannot pull the larger 1890 seed drill, which requires a higher-horsepower tractor, so there is no yellow dot matching those items. Selecting the 9520 tractor, which is larger, will show a yellow dot with the 1890 seed drill. You are not prohibited from buying incompatible equipment, but be aware that you can't use every implement with every vehicle.
When you are ready to make your purchase, click the Check Out button and your order is carried out. If you do not have enough money in your bank account, you will be asked if you would like to get a bank loan. When you close the market window, you will see you have deliveries waiting in the lower left corner of your screen. One by one, click each delivery crate icon and you can place your newly purchased equipment somewhere on the game map.
You may sell your equipment at any time by selecting it in the game map and clicking the Sell task icon.You will be offered a price by the local used equipment dealer. This used price will never be the full retail price, so it's usually smart to buy and keep your equipment unless you really need the money and don't expect to use the equipment again.
|
7820 Tractor |
Pulls implements for field tasks such as plowing and planting. |
|
9320T Tractor |
Pulls implements for field tasks such as plowing and planting. High horsepower for larger implements. |
|
9520 Tractor |
Pulls implements for field tasks such as plowing and planting. High horsepower for larger implements. |
|
5303 Utility Tractor |
Comes with a bucket and can be used to clean barns faster. |
|
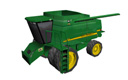
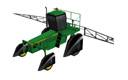
9660 Combine |
Harvests crops. Requires either the corn head or the hydraflex platform. |
|
6700 Sprayer |
Used to spray chemical fertilizer, herbicide, or pesticide on fields. |
|
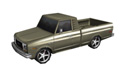
Pickup Truck |
Fast transport for a farm worker. Can carry 6 units of hobby goods to the roadside stand. |
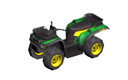
Gator 4x2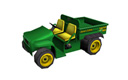 |
Fast transport for a farm worker. Can carry 4 units of hobby goods to the roadside stand. |
|
Buck EX |
Very fast transport for a farm worker. Carries 1 unit of hobby goods to the roadside stand. |
|
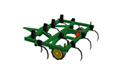
714 Mulch Tiller |
Plow fields with this light tillage implement. |
512 Disk Ripper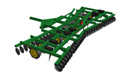 |
Plow fields with this powerful tillage implement. Requires high-horsepower tractor. |
1590 Seed Drill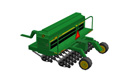 |
Pulled by tractor to plant wheat or soybeans. No-till drill means you don't need to plow first. 15' width. |
1890 Seed Drill |
Pulled by tractor to plant wheat or soybeans. No-till drill means you don't need to plow first. 40' width for faster planting. Requires high-horsepower tractor. |
1750 6-Row Planter |
Pulled by tractor to plant corn or sunflowers. 6-row model. Field must be plowed before planting. |
1760 12-Row Planter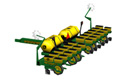 |
Pulled by tractor to plant corn or sunflowers. 12-row model for faster planting. Field must be plowed before planting. |
856 6-Row Cultivator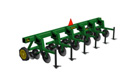 |
Removes weeds from corn or sunflowers. 6-row model. May only be pulled by 7820 tractor. |
856 12-Row Cultivator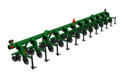 |
Removes weeds from corn or sunflowers. 12-row model for faster cultivating. May only be pulled by 7820 tractor. |
Hydraflex Platform |
Attach to combine to harvest soybeans and wheat. |
Corn Head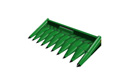 |
Attach to combine to harvest corn and sunflowers. |
Rotary Mover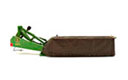 |
Attach to tractor to cut down mature hay. |
704 Wheel Rake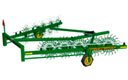 |
Attach to tractor to rake mowed hay into rows. |
582 Round Baler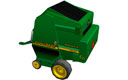 |
Attach to tractor to bale raked hay to prepare it for sale on the market. |
By growing crops, you can harvest and sell the grain for a profit. Your equipment will cost you money up front, but you'll be able to pay it off if you continue to grow crops each year.
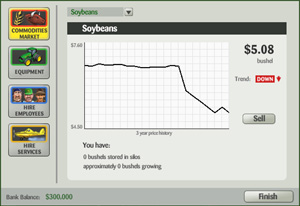
You have a choice of planting corn, soybeans, wheat, or sunflowers. Each crop type is a commodity in the market, with rising and falling prices. You may want to look at the commodities chart at the start of each season to see which commodities look like they might have the greatest demand and will earn the highest income.
![]() Corn
Corn
• Plant corn in April-May and harvest it in September-October.
• Use the 6-row or 12-row planter implement for corn. Your field must
be plowed first, so use the mulch tiller or disc ripper to prepare the field.
• Use the corn head with the combine to harvest.
![]() Hay
Hay
• Hay has a very short growth cycle so you can plant it anytime throughout the year. Once a hay field is planted it continues to produce hay until the winter season.
• Use a seed drill to plant hay. No plowing is needed with the no-till drills.
• To harvest hay first use the mower tractor attachment to cut it down.
• Second, use the rake attachment to rake the hay into even rows.
• Lastly use the bailer attachment to roll the raked hay into bails. To sell the hay simply click the field and select the Sell Hay icon.
![]() Soybeans
Soybeans
• Plant soybeans in May-June and harvest in September-October.
• Use a seed drill to plant soybeans. No plowing is needed with the no-till
drills.
• Use the hydraflex platform with the combine to harvest.
![]() Sunflowers
Sunflowers
• Plant sunflowers in May-June and harvest in September-October.
• Use the 6-row or 12-row planter implement for sunflowers. Your field
must be plowed first, so use the mulch tiller or disc ripper to prepare the
field.
• The corn head with the combine will also harvest sunflowers.
![]() Wheat
Wheat
• Winter wheat can be planted in the fall and harvested the next summer.
This lets you use your tractor and combine at different times of year to make
more efficient use of them.
• Use a seed drill to plant wheat. No plowing is needed with the no-till
drills.
• Use the hydraflex platform with the combine to harvest.
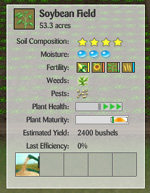
![]() When
you create a field on your parcel of land, it has certain attributes that you
can view. In Play mode, click on the field and you can view the field inspector.
Some attributes are only used while crops are growing on the field. This list
describes each attribute.
When
you create a field on your parcel of land, it has certain attributes that you
can view. In Play mode, click on the field and you can view the field inspector.
Some attributes are only used while crops are growing on the field. This list
describes each attribute.
| Composition | 1 to 5 stars. The general quality of the land. Some parcels of land have better quality soil than others. Better soil means healthier plants and higher yield at harvest. |
| Moisture | 1 to 5 drops. This shows the wetness of the soil, required for healthy plants. Low amounts of rain can explain why you might have unhealthy plants. |
| Fertility | Each of the four crops has certain fertility requirements. The four bars here show the quantity of nutrients suitable for each crop. You must either fertilize the soil (hire the crop duster or use the sprayer) or rotate your crops if you want to have healthy plants year after year. |
| Health | Negative 3 to positive 3 (red and green arrows). Healthy plants will have a higher yield than unhealthy ones. Very unhealthy plants are at risk of death. |
| Weeds | 1 to 5 weed icons. More weeds means your plants are choked and will be less healthy. Hire the crop duster or use a sprayer to spray herbicide to control weeds. Row crops (corn and sunflowers) can also be cultivated using the cultivator implement. |
| Pests | 1 to 5 pest icons. More pests means lower health for your plants. Hire the crop duster or use the sprayer to spray pesticide to reduce infestation. |
| Maturity | This indicator is important for deciding when to harvest the crops. The green bar moves from left to right, showing the maturing of the plants. Before it enters the bracketed zone at the right side, the plants are immature and will have no yield. Inside the bracket, the highest yield comes at the center, representing the ideal time to harvest. Lower yields result if you harvest too soon or too late. When the maturity bar reaches the far right side of this zone, the plants have died and crops rotted on the field. |
| Estimated Yield | Based on the acreage of the field and the type of crop, this shows you how many bushels of grain you might get if your plants are healthy and you harvest at the ideal time. |
| Last Efficiency | Only visible after a field has been harvested, this shows you how efficient your last crop was. If you have healthy plants and harvest at an ideal time with a skilled worker, this number will be high, representing a good yield. If you have unhealthy plants or harvest at the fringes of the ideal zone, you will have a lower efficiency. |
The following is a list of all the field tasks you can do in order to successfully grow crops.
| Plow |
Use the mulch tiller or disc ripper to plow a field and prepare it for planting either corn or sunflowers. Wheat and soybeans use a no-till system and do not require plowing. |
| Plant |
Use one of the planter implements to plant corn or sunflowers. Use one of the seed drills to plant soybeans or wheat. |
| Cultivate |
Row crops may be cultivated to reduce weeds. Use a tractor with one of the cultivator implements to do this. |
| Spray |
Use the sprayer to put down liquid fertilizer (to increase fertility for all crops), herbicide (to reduce weeds), or pesticide (to reduce pests). |
| Harvest |
Use the combine with the corn head to harvest corn or sunflowers. Use the combine with the hydraflex platform to harvest soybeans or wheat. |
| Mow Hay |
Use the Rotary Mower attachment to cut down the mature hay. |
| Rake Hay |
Use the 704 Wheel Rake attachment to rake the mowed hay into rows to prepare for baling. |
| Bale Hay |
Use the 582 Round Baler attachment to turn raked rows of hay into bales to be sold on the market. |
If your farm has no grain silos on it, your harvested grain will be sold immediately as you harvest it, at whatever the current market price is. This is an easy way to harvest, but it doesn't allow you to always get the best price, since you can't control when to sell the grain. By building a grain silo, you can store your grain after harvest and then watch the market prices. If you want to hold the grain for a while, in hopes that prices will go up, you can sell it at a later date. Or if prices seem to be going down, you can sell it right away.
If you have a silo, the harvest task will end and you must transfer the grain from your combine to the silo. With your combine worker selected, click on the grain silo and choose Transfer Grain. The worker will drive to the silo and fill it with the grain that was harvested. You cannot harvest another field until you have transferred this grain to your silo. You also cannot store multiple grain types in one silo. For example, if you want to raise both corn and soybeans, you must either sell the corn from your silo before putting soybeans in it, or you must build a second silo so each grain type can be stored separately.
Stored grain will slowly perish over time, so you cannot store it forever. A silo that is in need of repair will lose grain faster than a silo in excellent condition. Keep your silos repaired if you want to store grain for a long period of time.
There are three spray products you may apply to your crops by either hiring the crop duster or buying a sprayer vehicle. Fertilizer increases the fertility of your fields. Herbicide reduces weeds. Pesticide reduces pests. Each spray product comes in three brands. Each brand has a different cost, effectiveness, and chemical units. Effectiveness means how much fertility it will add or how many pests/weeds it will remove. For herbicide and pesticide, greater effectiveness also means a longer time period before the weeds or pests start to come back. Chemical units are the potency of the spray product. Too heavy of a dose of chemicals will hurt your plants' health. Chemicals wear off over time, so it is wise to delay between sprayings. If you spray heavy duty fertilizer, herbicide, and pesticide all in a short time period, the soil will not be healthy for plants and you may have a hard time growing crops. A better strategy would be to spray a few months apart, or choose spray products with lower chemical units.
Note that you don't have to spray your fields at the first sign of weeds or pests. In fact, a small number of weeds and pests will have no effect at all on your crop health. Only when weeds or pests rise to a higher level (3 or more icons in the inspector) will they start to hurt plant health

 To
raise animals you must have a barn with a fenced enclosure. The standard small
and large barns may hold any type of animal. The dairy and hog barns are specialized
for only one animal type. After building a barn, you may go into Build mode
and click on the barn to add either one or two fenced enclosures. You might
have two enclosures on a standard barn so you can raise two animal types, or
you might have two fences on a specialized barn so you can manage the feeding
and buying/selling differently on two groups of livestock.
To
raise animals you must have a barn with a fenced enclosure. The standard small
and large barns may hold any type of animal. The dairy and hog barns are specialized
for only one animal type. After building a barn, you may go into Build mode
and click on the barn to add either one or two fenced enclosures. You might
have two enclosures on a standard barn so you can raise two animal types, or
you might have two fences on a specialized barn so you can manage the feeding
and buying/selling differently on two groups of livestock.
Each barn only holds a limited number of animals. Similarly, each fenced enclosure
can only hold a certain number of animals based on its size. If it seems that
you should be able to hold more animals in your barn, you might need to adjust
the size of the fence to make it large enough to support the full quantity of
animals. Horse stables and chicken coops function the same way.
Angus cattle require that you create a pasture to be able to raise them. To create a pasture go to the build menu and click the New Pasture button found near the bottom of the build menu.
Pastures are
created similarly to fields however they must be placed over even, grassy land as opposed to dirt. Pastures are covered in more detail in the Land section of the help.
To buy or sell animals, click on the fenced enclosure in Play mode and select one of the Buy or Sell tasks. With standard barns, once you have purchased animals for an enclosure, you may only add that same animal type. Hog and dairy barns may only have one type in any case.
Animals are always purchased as immature animals, and the immature price is
a fraction of the commodity market price (viewed in the market menu). As you
feed the animals, and time passes, they will gain weight. You can sell them
as immature, but the sale price will still be the reduced amount. If you hold
the animals until maturity, you will get full market price for them and will
be more profitable. You don't have to sell them as soon as they mature, you
can keep feeding them to increase their weight. Eventually animals will die,
but usually you will want to sell them soon after they mature. Most livestock are sold by the pound with the exception of horses; which are sold at market price per head.
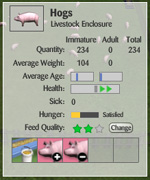
![]() When you select a livestock enclosure in Play mode, you will see an inspector showing
information about the herd. Each part of this inspector is described below:
When you select a livestock enclosure in Play mode, you will see an inspector showing
information about the herd. Each part of this inspector is described below:
| Quantity | Number of immature and mature animals in this enclosure. Limited by barn capacity and fence dimensions. |
| Average Weight | Average weights of the immature and mature animals. Over time, with good health, weight will increase. You'll make a greater profit by selling larger animals. |
| Average Age | Bars move from left to right showing progress through maturity. When the immature animals reach maturity, they are added to the mature category. If the mature animals reach the end of their life span, they will die. |
| Health | Negative 3 to positive 3 (red and green arrows). Healthy animals gain weight faster and avoid sickness. |
| Sick | Number of sick animals in the herd. Caused by low health and dirty barns. |
| Hunger | Lets you know when to feed the animals. When hunger is low, animals have plenty of food and will be in good health, gaining weight quickly. As hunger increases, animals are less healthy. Perform a feed task to reduce hunger. If hunger reaches the highest level, animals will starve and die. |
| Feed Grade | 3 stars show currently selected grade. Higher grade feed makes animals healthier but costs more. Click the Change Feed button to choose another grade. This change won't take effect until the next feeding. |
| Milk | Mature dairy cows produce milk over time. As this bar moves higher, you need to milk the cows to earn money. If the milk level reaches the maximum level, the cows will have reduced health until they are milked. |
| Eggs | Mature chickens produce eggs over time. As this bar moves higher, you need to retrieve the eggs to earn money. If the egg level reaches the maximum level, the chickens will have reduced health until the eggs are gathered. |
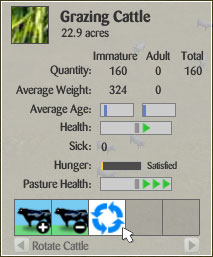 |
Pastures have a slightly different panel with the addition of a readout for Pasture Health and an icon to Rotate Cattle. Use this to change the cattle to a different pasture to keep your pastures and animals healthy. To rotate your cattle simply the Rotate Cattle icon and then select the pasture from the popup list you would like the cattle to be moved to. |
Health is affected by several factors: keeping the barn clean, keeping the barn repaired, feeding the animals, and the quality of the animal feed purchased.
Higher health animals will gain weight faster than average health animals. Low health animals will actually lose weight and may become sick. You can order a task to try and cure the sick animals, which may or may not be successful, depending on the skill of the worker. You can also hire the veterinarian as a service from the market menu. There is a cost per sick animal, but the vet has a better chance of curing the sick animals than farm workers do, and the vet will care for all sick animals anywhere on the farm. Sick animals do not gain weight and are sold at a lower price than healthy animals. You can reduce the chance of sickness by building a windmill anywhere on your farm, which pumps fresh water for your animals.
Mature animals will reproduce, adding more immature animals to your herd. If your barn is full, or your animals are in very low health, they will not reproduce.
The following is a list of all the tasks you can do in order to successfully raise animals.
| Feed |
This task is selected on the livestock enclosure. If you have two fences on a barn, the two herds of animals must be fed separately. |
| Care for sick |
Perform this task on a herd that has sick animals. A certain number of them may be cured. |
| Clean Barn |
Perform this task on the barn to reduce its dirtiness. If you do it while driving the utility tractor, the task will be completed faster. |
| Buy animals |
Add immature animals to the selected livestock enclosure. |
| Sell animals |
Sell immature, mature, or all animals. |
| Milk cows / Gather Eggs |
For dairy cows, reduces the milk level and earns income. Milking cows in the Dairy Barn will be faster than in a normal barn. |
 To
earn some extra income on your farm when your workers have spare time, you can
build hobby structures and sell the goods at a roadside stand. You must build
a roadside stand to use any of the other hobby structures. The larger stand
earns more income than the smaller stand. Your farm reputation also affects
the sale price of the goods. A high-reputation farm will earn more money than
a low-reputation farm.
To
earn some extra income on your farm when your workers have spare time, you can
build hobby structures and sell the goods at a roadside stand. You must build
a roadside stand to use any of the other hobby structures. The larger stand
earns more income than the smaller stand. Your farm reputation also affects
the sale price of the goods. A high-reputation farm will earn more money than
a low-reputation farm.
Just as you need a roadside stand to sell goods, the stands are not useful
unless you have hobby producing structures. These include the vegetable garden,
flower garden, honeycombs, and greenhouse. When you build these structures,
they begin producing goods. You can view the contents of the structure by clicking
on it in Play mode and seeing the progress of the production bar. At any time,
you can order a task to sell the goods. The worker will gather goods from the
producing structures and carry them to the roadside stand, where they are exchanged
for money. If your worker is on foot, he or she will carry a small amount at
a time. If your worker is in the gator or pickup truck when you assign the task
to sell goods, he or she can carry more in one trip. The Buck ATV does not carry
additional goods, but it does carry the worker very quickly.
During the game, various events may occur. Some are random, some are triggered by game activity. When an event occurs, a message will appear telling you what happened. Sometimes you may want to change your plans based on an event, such as if prices of a certain commodity suddenly have changed. Other times the event may not be important to you. Some events can be very good, like getting extra income or a boost to your reputation. Others are bad, causing you to lose money or have another negative consequence.
You can view your farm's reputation in the Farm summary window. Reputation ranges from 1 to 10 and new games begin at 5. Sometimes an event may occur that raises or lowers your reputation. Other times you can earn a bonus (or a penalty) based on conditions on your farm. Building some structures, such as the farm sign, luxury mansion, and Paul Bunyan statue, will earn a bonus to reputation. The bonuses and penalties are listed below
| Hardy Animal Bonus | Reputation +1 if all the mature animals on your farm are at least 20% above average weight. |
| High Yield Bonus | Reputation +1 if, at the end of the season, average yield on all fields was at least 10% above base levels. |
| Extravagant Farm Bonus | Reputation +1 for purchasing the luxury mansion, Paul Bunyan statue, or solid gold tractor. |
| Infamous Boss Penalty | Reputation -1 for each worker you fire. Penalty lasts for 2 years. |
| Dilapidated Farm Penalty | Reputation -1 if the average maintenance of your structures is below 50%. |
| Bounced Paycheck Penalty | Reputation -1 if an employee quits because you don't have the cash to pay him or her. |